

don't try this at home
— Update: This post has received a lot of views and not a lot of comments. Please feel free to comment or send me a direct message if you have questions regarding your screen repair project. I will always do my best to answer your questions, or ad new blog posts in regards to common questions. —
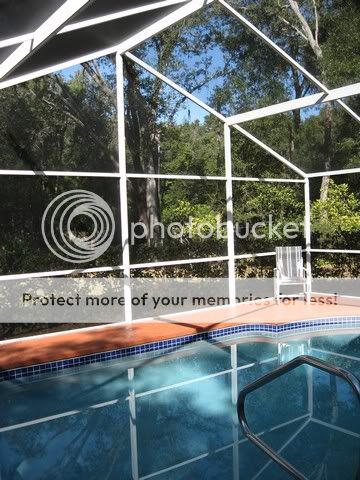
It always feels good to complete a home project yourself. This is the joy of a Do-It-Yourselfer. As the weather becomes warmer here in Central Florida, your swimming pool or screen porch will begin to look more and more inviting. This is usually when you notice holes in your screens, doors that don’t open correctly, and a few months worth of dirt. When it comes to screen repair, a screen enclosure can range from a very small, one panel, framed in opening to a very large pool enclosure consisting of 50-100 screen panels. This being the case, when can you roll up your sleeves and go to work as your own handyman or handywoman, and at what point should you call a professional? We will discuss the difficulty of different projects, the different repairs you may face, and what is involved in completing those repairs.
Repairing screen is a job that few people master, and even many handymen have trouble finishing a job correctly. This is despite the fact that with a few simple considerations, anyone can achieve the results they desire. That does not mean anyone can go out back and rescreen their entire pool enclosure (Please DO NOT try this, and certainly don’t say it was my idea!). What I mean is that if you evaluate your repair before you are knee deep into it, you can save yourself the headache of starting a project that is beyond your abilities and leave that one to the professionals. This however doesn’t mean that every repair is off limits.
First let us consider your skills. If your reading this because you’ve never done a home repair yourself, and you want to give it a go and get something under your belt, unfortunately I don’t think screen repair is the best place to start. Mainly because to properly replace even a single screen panel, or repair a screen door handle, you will need more than the standard household tools, and you will spend money at the hardware store that will be wasted should the project prove to be too difficult. Calling a professional screen repair company will be worth your while, as a simple repair will not cost more than $80-$100. For those who consider themselves handy, and usually take care of small repairs around the house, any small screen repair should be within your ability to complete with success. These would include replacing a single torn screen panel, replacing the door hardware on a screen door, or even reattaching a loose piece of metal or replacing rusted fasteners. Then there are the large repairs. These include rescreening an entire porch or patio enclosure, replacing torn panels on the roof (or ceiling) of a pool cage, or new construction of a screen enclosure. These should only be attempted if you consider yourself very handy, and have previous construction experience. More often than not, and for your own safety, these repairs should only be completed by trained professionals.
If you’ve decided you will go forward with you’re repair, now you must evaluate what needs to be done. If you have a single screen panel that is torn and needs to be replaced, you will need to remove the old screen and install new screen. Measure the opening and purchase the new screen material (sometimes called screen mesh, insect mesh, or pool and patio screen) and tools to install it with. Before installing the new screen, always make sure all debris is cleared away from the opening and you have removed all obstacles from the work area. [Check back later for articles on details of how to install new screen] If you have multiple panels that are damaged, the process is the same, only you will need more material, and will want to set aside more time to spend installing the new screen. You should also remove the old screen from only one panel at a time, so if you run into any delays, you can leave the remaining panels to be repaired at a later date. If you are ready to rescreen an entire enclosure, it is always easiest to work in large stages. These will include gathering new material, removing all old screens, cleaning and prepping the entire enclosure, and installing the new screen. If you are not experienced installing screen, you could expect a small porch (apx 8’H x 12’W) to take four to six hours to complete. Other miscellaneous repairs that you may look to complete include: replacing lower (base) panels with pet resistant screen, adding a pet door to an existing enclosure, cleaning mold and mildew from an enclosure, painting scratches or blemishes on the aluminum etc. Many of these will require other tools and material that must be purchased from an aluminum distributor. As time allows, we will go into further details on these repairs and others, and how they can improve your outdoor living spaces.
After taking a more detailed look at what is involved in completing several types of screen repair, and considering the difficulty of different projects, I hope you feel better about the repairs you are facing. If you’ve deciding to take on your repair project yourself, check back for future posts covering specifics of installation techniques. If you think you’re repair is better served by a professional screen repair company, there is no shame in that. As we mentioned earlier, your safety should be your number one concern when considering any handyman task. Either way, as we come into spring and sizzle into summer, now is the time to tidy up that outdoor area, and look to repair and clean your patio or pool enclosure. Don’t let bugs and leaves spoil your relaxation. Take out the toolbox, or pick up the phone, and you can be lounging around worry free in no time.
You can contact Screenologist Inc. for all of your screen enclosure needs. Central Florida 407-788-7419 Greater Tampa Area 813-223-3484 or Toll Free at 888-322-7419
Visit us on the web www.Screenologist.com
Email – sales@screenologist.com

Hello… I think it is better Screen Enclosure Repair done by a professional screen repair company. As you mentioned above, safety is prime concern when considering any handyman task. Repairing screen is a job must carry out by a professional handyman.
I have decided to take on re-screening my pool area of my home which is aprox 1300 square feet of screening. I have the bottom all completed and doors byt am having a hard time on the roof. I spent 8 hours yesterday and just about got 1/3 done. Do you have any helpful hints on istalling the roof pannels that might be helpful. I have been in the construction business for years but never tackled a screen porch. Any helpful hints would be appriciated.
Thanks for the question Bob.
on the typical pool enclosure, there are two main elements to the roof construction. One is the roof beam (usually a 2×6 or larger), and the Other is the cross pieces or perlins ( usually 2×2). The beams run the length of the enclosure, from the house out across the pool to the far side of the enclosure. The safest way to approach screening the entire enclosure roof is as follows.
PLEASE NOTICE – SCREENOLOGIST INC. IS NOT LIABLE FOR THE RESULTS OF THE FOLLOWING INFORMATION. THE FOLLOWING INFORMATION DOES NOT CONSTITUTE PROFESSIONAL ADVICE . ONLY A LICENSED AND INSURED PROFESSIONAL SHOULD PERFORM SPECIALIZED REPAIRS.
Now that that is out of the way 🙂
The entire roof of the enclosure can be screened off of a long walk plank. by setting the plank up on ladders, a few feet below the roof beam, and parallel with the roof beam, you can screen the first few feet of all the panels you can reach. Next move the plank a few feet further away from the beam (still keeping it parallel) and screen some more of the panels. by continuing this process across the entire width of the enclosure roof, you can screen every panel. the very ends can be reached off of a ladder from the outside of the enclosure.
This requires
2 ladders high enough to reach a few feet from the bottom of the highest roof beam.
1 plank long enough to reach over the entire pool parallel with the roof beam. (here is an example of a plank that you may find at an equipment rental business – http://tinyurl.com/3vqryyy )
Many professional screen installers work off of the enclosure its self, but this is extremely dangerous and IS NOT ADVISED.
Thanks for the helpful info. I have 30 roof panels in a 6 x 5 pattern and I’ve tried to think of every way imaginable to reach all 4 sides of each panel without getting on top of the enclosure. But I just don’t see any way around it. But reading your post above, it sounds like it may be possible. If so, can you describe more how it can be done? If all else fails, I was planning on spanning the gaps between the thick beams with a few 2″ x 12″ pieces of lumber. This should serve to distribute my weight a little better, although I’ve never seen anyone do it before.
IMPORTANT INFORMATION
HELP AND ADVICE ON THIS BLOG IS OFFERED TO VISITORS FOR INFORMATIONAL PURPOSES ONLY. SCREENOLOGIST INC. ASSUMES NO RESPONSIBILITY FOR THE RESULTS PRODUCED FROM ITS HELP AND/OR ADVICE IT GIVES.
A board can be used as you’ve described. You will need to take caution not to drag or slide the board on top of the beams, as this will damage the screen that is already installed. sometimes wrapping the board in cloth or carpet can prevent this.
The method I described in one of my earlier posts, involves setting up a long walk plank on ladders, below the beams, so that when you stand on the plank, the beam is at your waist or chest level. This allows you to access the panel to begin screening it, then as you move the ladders and plank over, you can access more of the panel until you have screened the entire roof.
these methods involve working on ladders or on top of the enclosure, both of which can be extremely dangerous.
I have four panels that need to be replaced on my pool screen enclosure. I am going back and forth on options on whether to hire someone to do it or do it ourselves. I am looking into pricing options/time for both. Where is the best place to purchase the screening material if we decide to do it ourselves? I have tried doing a google search but I am not coming back with the results I want so I think that I am using the wrong terminology.
Thank you!!
Depending on where you live, the local big-box hardware stores will carry a decent supply of screen. When searching online, it may be listed as insect screen, window screen, insect mesh, or fiberglass screen. If you live in an area where aluminum screen enclosures are common, there will usually be 4-5 major wholesale distributors of material for that industry. Often they will only sell to licensed contractors, but there are some who sell retail to the public. It may be worth your time to call around and see who will sell to you, as they will have a much larger selection of screen types and sizes, as well as any other parts you may need for the repair. Be aware however, that they will most likely not sell in small quantities like a hardware store. Screen will come in 100′ rolls, and spline (rubber strip) will come on 1000′ rolls.
first , thanks for this site. i want to cover one third of my pool enclosure. each section is apprx. 90×80 and i think i would need 2 pieces , could i just overlap them or would they need to be cut to fit? would it matter which way i ran the piece? if it is corrigated i was thinking it should run with the line of the house so the water would flow away. also if i had to use 2 pieces then i would have to run a support piece? what matieral do you suggest? should i caulk around the screws? many thanks
This is not something our company usually deals with. I have seen it done, so I can only offer my observations. The panels can be overlapped. You are correct that you want the ridged to run in the direction you want the water to flow. You should not need to caulk around the screws if you use the correct type. This is the type of fastener I have seen used most often with corrugated roofing. http://www.amazon.com/Hillman-Fastener-561059-Self-Drilling-Screw/dp/B000H5WTKM/ref=sr_1_10?ie=UTF8&qid=1329412846&sr=8-10
what is a fair price to pay a professional to come and repair 7 panels on my small condo porch on the 1st floor. total size is 11 ft by 8 ft. including all 7 panels and the screen door. Thanks so much for your helpful site.
Thanks for your question.
For a very basic repair, with standard ,name brand screen, and no additional work, you should be somewhere in the $100 -$150 range. There can always be other variables that effect price. This is just a basic guestimate.
my question is can I paint the beams prior to installing new screen….I’m thinking I’ll spray over the old screens “with the spline still in place!” so i don’t fill the gap with paint——then working in small sections—-I can re-screen and paint the entire enclosure. Seems simple enough….however as a DIY handy man, I am not sure what I may run into—–and—-theres little out there to guide me in this project! .
I have seen enclosures painted before although it is not very common. There are even companies that electrostatic paint them. What you said about leaving the spline in place for the painting is key. you DO NOT want to end up with obstructed spline grooves. Even if you are leaving the spline in place during painting, it is still possible to have some paint build up around the edges of the groove, so be cautious to not paint that area too heavily.
Also be aware of over spray on the sections of new screen already finished. If its a dark color paint, it might not be very noticeable, but a lighter color certainly will be.
This may be difficult to explain. I have a section coming off the house about 12″x72″ that I want to put a covering over as to block water from rain coming through. It’s in a tough spot to access because it is against the house and then goes right into an up angle. Should I use a roll of kick board to use as the covering, and is there a way, perhaps affixing it from inside the pool screen? If I’m not coming across with what I’m trying to get across, I’ll take a couple of pics. Thanks
I don’t quite understand what you are explaining. Typical roofing options with an aluminum enclosure are pro-pans, or elite panels (insulated structural panels). Feel free to send additional information or pictures to me directly at screenologist@gmail.com
Lets say I wanted to replace the screen on the ends of my cage .is there a plastic rather than screen that can be used to make it water proof like a green house?
I have exsercise equipemnt that would be great to keep out of the rain.
Thanks
Phifer inc. makes a product called Glas-Shield which is a vinyl laminated insect screen. It is opaque, so it will let light through, but not water. I know sometimes the big box hardware stores carry some of Phifer’s products, but I’m not sure if they carry this particular one. It is a product our company stocks, and installs. Be aware that the life time of this product is shorter than standard screen, especially in high sun exposure, due to the fact that the vinyl layer will get brittle and begin cracking after apx 5 years.
Other than Glas-Shield, I haven’t seen any other products that does not let water through, aside from installing exterior panels (corrugated plastic/metal for example) attached to the enclosure.
I have had pretty good luck replacing some of my bad roof screens but now I am up to the corner panel which is not totally square. I can’t seem to get this one installed without wrinkles. What am I doing wrong? Thanks
Thanks for the questions. I would assume if you are having trouble with the corner roof panel, that your enclosure is built using the mansard style design. Please take a look at the different enclosure types here – http://www.screenologist.com/phonequote.htm to confirm if this is correct. The following example is for a mansard style roof corner panel.
Example Diagram – http://imgur.com/2GKWr
You will screen the panel in four main steps. step 1 and 2, the screen will be rolled straight/square with the metal. For steps 3 and 4 the screen will need to be pulled tight while rolling in the spline, and due to the fact that the panel is not square, the screen will be rolled in crooked as you get closer to the far corner. I’ve drawn small arrows on sides 3 and 4 indicating which direction you will want to try and pull the screen tight as you are rolling it in. The reason for this, is if the panel is past a certain ratio out of square, you may end up with an excess accumulation of screen at the far corner. If this happens, you will need to remove the spline from side 4, and re-roll it in the opposite direction (from far corner back toward end of side 2). If, when you get done with this there is an accumulation of excess screen here, you can then re-roll part of side 2 (usually from half way, back down to where it meets side 4).
I apologize if this is confusing. This is one of the hardest types of panels to screen without getting bubbles of excess or loose screen along the edges.
Thanks so much for the tips. I successfully replaced a mansard style corner today
How do I rescreen the top corner roof panel witch way do I start from it has a cross braceing
Please see my previous reply to Bob. I explain how to screen this type of panel.
Great job very professional.
Thanks for the advise on this blog. Very helpful information
We had our pool rescreened approx. 5 years ago. The roof/ceiling panels are failing due to the splining pulling out. We are planning on having it done professionally – but here lies my problem. We have been told we have a combination of flat spline (running from the roofline out away from the house) and round spline going the other way. There seems to be no consistency in the estimates we’ve gotten…..some think it best to rescreen each section individually, which is how it was done 5 years ago. Another says it best to ‘blanket roll.’ Some say the reason it’s failing is the round spline versus flat spline, one says the installer pulled the splining too tight, another says it was probably a bad batch of spline. After 3 estimates, we are more confused than ever. Can you address some of this here? What is your thought on blanket rolling versus section by section? Our expectation is that we should get more than 5 years from a rescreen. The estimates/opinions have come from people that have been in business for 25 years plus. PLEASE HELP!
I’ll do my best to answer in a clear way. The type of spline used is determained by the metal of the enclosure. Up until the mid 1980’s, round spline was all that was used. Round spline is engineered to blow out in high wind. Due to this design, there are other issues that arise, like screen slipping loose due to improper installation or pressure from debris buildup or wildlife.
As to whether or not to blanket roll the screen, that is a decision you will have to make. There are pros and cons to either type of installation in your case. If an enclosure is all flat spline, it is always preferable to split all panels individually. However for you, if you do, there is always an increased chance for the round spline portions to come loose. If you blanket roll the screen, you have two major issues. 1st is that the screen will ripple or wave when you have average wind. This can be unsightly for some people, and could also lead to damaged screen as it gets older and brittle. 2nd is the fact that, past a certain age, you cannot replace individual panels on a section that is blanket rolled, which can lead to increased repair costs down the line.
If round spline is installed correctly, it should stay in place for the life of the screen, except for the situations mentioned above. There is always an increased risk of round spline coming loose.
I hope this answers dome of your questions.
I have a, hopefully, simple question. I have a A frame pool enclosure. I have a flat aluminum ‘roof’ between the actual roof and the edge of the enclosure. I mention this because this is a structure that will ‘cave in’ if I walk on it, purely for the gap and keeping rain out as well as to direct water into the gutter running along the back against the roof. My problem is that something pulled the spline out from the screen on the lower panel on the house side of the enclosure from the second ‘rib’ from the end. I just need to reseat the spline but how do I get to it without coming through somewhere and going for a swim? It’s already worked itself out to the next panel up at this point. Is this a DIY or do I need my pool screen guy to fix this? If I lay a plank down across the ribs I can’t reinstall the spline because the plank will be over it.
I apologize for the delay in responding. I’m having trouble understanding the situation from your description. Would it be possible for you to send me a picture of the area. I would be then be able to help you with the repair.
I have a mansard cage that is 60′ x 40′ and an additional flat top section of 25′ x 14′ that butts up to the back of the garage. There are about 10 panels that need to be replaced, mainly because of the screen pulling out from under the flat spline. Fortunately the panels are on the angled sides of the mansard and not on the roof top. I saw your diagram on how to screen the corner of the mansard, thanks for that info. My question is how do I go about the square blocks? Do I spline the top and the bottom first, then left and right – or top and left then right and bottom? I have replaced some of the side panels and haven’t quite figured out the best order, I always have to go back and pull out some slack.
Both methods you described are right depending on the circumstance. Sometimes order is determined by obstacles or obstructions. Always try to install the spline on the most difficult to access side first. side-top-side-bottom is typically the fastest order, but requires more skill/practice. side-side-top-bottom makes it easier to ensure the screen is in place square, which will make tightening the panel much easier.
I have a 15’X33′ screened lanai on three sides, the fourth side being the outside back wall of the house, which needs complete rescreening and painting (39 panels). The canal side, opposite the house side, has a high cathedral ceiling with screen panels up to the roof. The roof is aluminum. How do I get up there safely to screen the high panels on that side? Do I need to rent scaffolding or is there another way, short of renting a “Genie”, to do it? Also, do I thinly paint the groves to protect them as I paint the frame or will that make inserting the spline more difficult?
Jan S.
For high walls, installers will typically use two ladders with a walk board. This is the quickest and easiest to set up when dealing with uneven ground and landscaping. Scaffolding can also work depending on the application. In either case, extreme caution is always needed when working at heights.
As to painting, We always recommend NOT to paint the spline groves when painting any type of enclosure. The easiest way to do this is to paint with the old spline in place. Paint in the grove will make it difficult to install the spline. The paint on an aluminum enclosure is cosmetic, as there is no worry of rust with aluminum framing. There is no extra protection needed in the grove.
I appreciate your feedback. I had planned to strip the lanai spline and screening and paint the channel along with everything else. I am glad to know how professionals handle a screening project.
Thanks again.
Jan
For privacy reasons I would like to paint a scene on the screens around my lanai. Do you have any suggestions on how this might be done?
I don’t have any experience with this type of project.
Trying to find a warehouse in the Orlando area to buy larger rolls of screen and spline than you can buy at regular hardware stores. Can’t seem to even find one that I could ask if they would sell to a homeowner – not being a contractor. Are you able to give me any insight on this?
White aluminum in Mt Dora, and Ace aluminum in Casselberry are the only material warehouses that sell retail as far as I am aware.
I cannot thank you enough!
I would like to try to replace the rusting screws on the bottom rail of my pool cage. I am fairly handy but have heard all kind ot stories.
Typically this is a straight forward repair. The biggest obstacles would be with non standard deck material. Some examples of these would include Chattahoochee, Flagstone/Slate, Brick Pavers, Travertine, and to cover all of these materials is beyond the scope of this comment.
For a concrete deck, bolting through a 1″x2″ piece of aluminum, the most common fastener is a 2 1/4″ quickset. Be aware that building codes change county to county, and something different may be required.
The most secure method of replacing rusted deck screws, is to drill a new hole in the aluminum using a metal drill bit, apx 2″ adjacent to the existing bolt using. Next using the proper size drill bit for the concrete anchors you are using, drill through the hole in the metal, and down into the concrete deck. After this hole has been drilled to the proper depth, securely fasten the anchor until the aluminum is held tight to the deck, being careful not crush the aluminum by over tightening.
Once this is all finished, you can caulk the hole from the old bolt for cosmetic purposes.
I just completed screening my pool enclosure above the chair rail. Everything went smooth, and the screen looks great.
I have decided to install Phifer Glas-Shield on the lower sections.
Is the ease of installation of glas-shield similar to standard fiberglass screen, or is it more challenging?
Thank you.
It is significantly harder to roll glass-shield. While the overall process is the same, it is much less forgiving. First off, if you have to pull the spline out to reroll a section, it will often have damaged the vinyl layer. It must be started and rolled very straight and tensioned very evenly, or it will ripple badly. It is much less forgiving than traditional screen. It is also recommended to install it with the textured side facing out, as it will better grip the spline.
It’s definitely doable, but requires more precision and patience.
Also keep in mind, if it receives direct sunlight, the vinyl will begin to degrade after 3-4 years.
Hope this helps.
Thanks for the few tips you gave me. Texture out, even rolling and tensioning.
I tackled it yesterday, and after 9 hours of labor, and sore shoulders and forearms, it looks really good. No ripples and everything is snug.
Thanks again
I have a 5″ super gutter that has two seams in it that leak badly. In fact some of the fascia has rotted away in those two spots. The seam pieces are about 3″ wide and appear to have been riveted to the gutter pieces. One of them is barely even holding onto the gutters. Can those two seam pieces be removed and new pieces put in place? If that is okay to do, how would one attach them to the gutters? After attaching how would they be sealed. I can’t see detaching the whole structural gutter from the house just to replace the whole super gutter. The gutter itself is solidly attached. Also, the rain comes down in buckets here on the Gulf Coast and I can’t imagine even a 7″ gutter containing all that water. The 5″ gutter does not when we have a hard rain. It’s like watching a waterfall on the lanai sometimes. To have these two seams replaced and sealed do you have an estimate of what someone should charge? Do you think it is a DIY type of job? Thank you for your advice in advance. Barbara in Palm Harbor
I would not consider this type of job a DIY project. Often if there is wood rot, either the whole gutter will need to be detached from the house to allow for the wood to be repaired by a carpenter. Afterwards the existing gutter can be reattached and the seams can properly spliced and re-sealed. Unless you get to the source of the problem this will likely be a costly repeat repair.
I was curious, how much weight will the top of the pool enclosure hold if I decide that option to fix the panels?
I’m sorry. I’m unable to give that type of advice due to liability reasons. If the panel borders any of the outside edges of the roof, you can often screen the first 3/4 off a ladder from inside, and the last 1/4 from a ladder on the outside. If you do choose to work on top of the structure itself, be very cautious and aware of rusted screws. These are often not visible as the structure is partially screwed together internally.
The Florida screen laminate is peeling on my pool enclosure. Since the screen is in good shape I would like to remove the laminate. Any ideas on a solution that would loosen it without damaging the screen?
I’ve only ever replaced that product at the point where the vinyl starts to peel. My only thought would be to gently scrub the peeling coating with a bristle brush.
I have a charcoal grey aluminum enclosure where the aluminum has faded over the years. I want to “restore” the aluminum panels and kickplate to their original color. What do you recommend ? Painting or spray painting ? At a recommendation, I tried naval jelly, but it leaves a chalky residue. Any ideas, and is there any company that does this service in So. Florida ?
In the past there have been companies offering electro-static painting to refurbish aluminum structures. I don’t have any contact info currently. I’ve seen mixed results from standard painting. #1 considerations is to avoid getting paint into the spline groves (where the rubber holds in the screen) as this can make future repairs tedious and costly.
If you choose to try spray paint, be sure to get the paint from an aluminum contractor or wholesale warehouse, as they have exact color matching paint for the major aluminum patio extrusions.
Do I need to remove the 6″ square corner plates on the enclosure or is there some trick to screen around/benind them?
Thanks
I’m not sure exactly what plates you are describing. Are they located where the diagonal support braces meet the main vertical and horizontal structure? If so, yes they will need to be removed. Typically they are attached with self tapping sheet metal screws with either 1/4″, 5/16″ or 3/8″ hex heads.
Will the splines of an aluminum pool enclosure hold sheet plastic? I’m only looking to do a vertical wall, not the roof, of a patio.
If you could be more specific I will do my best to answer. I don’t quite understand what you are trying to do.
My pool cage appears to be about 11yrs old. I live near the ocean so everything rusts. Some of my anchor bolts have rusted the point that they needed to be replaced which I did. I have decided to go through the whole structure and replace screws as needed. Apparently the cage had been rehabbed?? sometime and some of the screws are held in by caulk!! I would plan on using larger screws that get a good grip. Any screws that would be less susceptible to salt air that won’t cause galvanic corrosion in the aluminum? Any other points you can share? The good news is I have replaced many screen panels and the frame is stable. I am a retired engineer who has done almost any home project including complete remodels. Just looking for best practice ideas.
Standard fasteners are ceramic coated steel, often with a painted head. If you are willing to spend the money, stainless steel fasteners are available, but often cost 4x that of ceramic coated steel.
What does it cost to reinforce the Screen Enclosure Wires (I have 6 of them) as they are old and popping out. Is there a new regulation to tie them down to the ground or concrete..
Price varies depending on cable length. Most company’s charge in the ballpark of $50-$100 per cable to remove the old hardware, and install a new one meeting current building codes. Building codes have become much more stringent over the past 5-10 years. To bring an enclosure into compliance with building codes often requires adding several additional cables, among other things.
how long does it take to do a pool screen enclosure for a single-family home the hold screen? Also what does it cost? And should it take 3 day to do the job?
Depending on how many workers are on the job site, a standard pool enclosure will take between 1-3 days to re-screen.